
Why Are Bubbles Forming After Peptide Reconstitution? 9 Powerful Fixes for Peptide Researchers

Bubbles After Reconstitution: What Researchers Really Need to Know
Bubbles after reconstitution are one of the most common things that can cause unnecessary concern when working with lyophilized peptides.
A researcher adds the appropriate diluent, begins dissolving the peptide, and suddenly sees bubbles, microbubbles, or even a layer of white foam. The immediate question is usually:
“Did I just destroy the peptide?”
In many situations, the answer is no.
Bubbles after reconstitution can simply be a physical consequence of how liquid entered the vial, how much air became entrained, how aggressively the sample was mixed, and how the peptide or formulation interacts with the air-liquid interface.
However, there is an important distinction between temporary bubbles and persistent turbidity, particles, precipitation, or unusual discoloration. Those observations should not automatically be dismissed as harmless bubbles.
I have worked with peptide researchers and peptide-related quality questions since 2003, and one recurring lesson is that researchers often interpret what they see before determining why they are seeing it.
That is particularly important with peptides such as BPC-157, TB-500, CJC-1295, Ipamorelin, Semaglutide, Tirzepatide, GHK-Cu, and other research peptides.
This guide explains the science and practical troubleshooting behind bubbles after reconstitution, including what causes them, how to reduce them, when they are usually transient, and when further analytical investigation is appropriate.
«Important: This article is educational information for laboratory and research settings. Reconstitution, storage, and handling requirements should always follow the specific product documentation, validated laboratory procedure, applicable regulations, and manufacturer’s instructions. Research-use material should not be assumed to be suitable for human administration.»
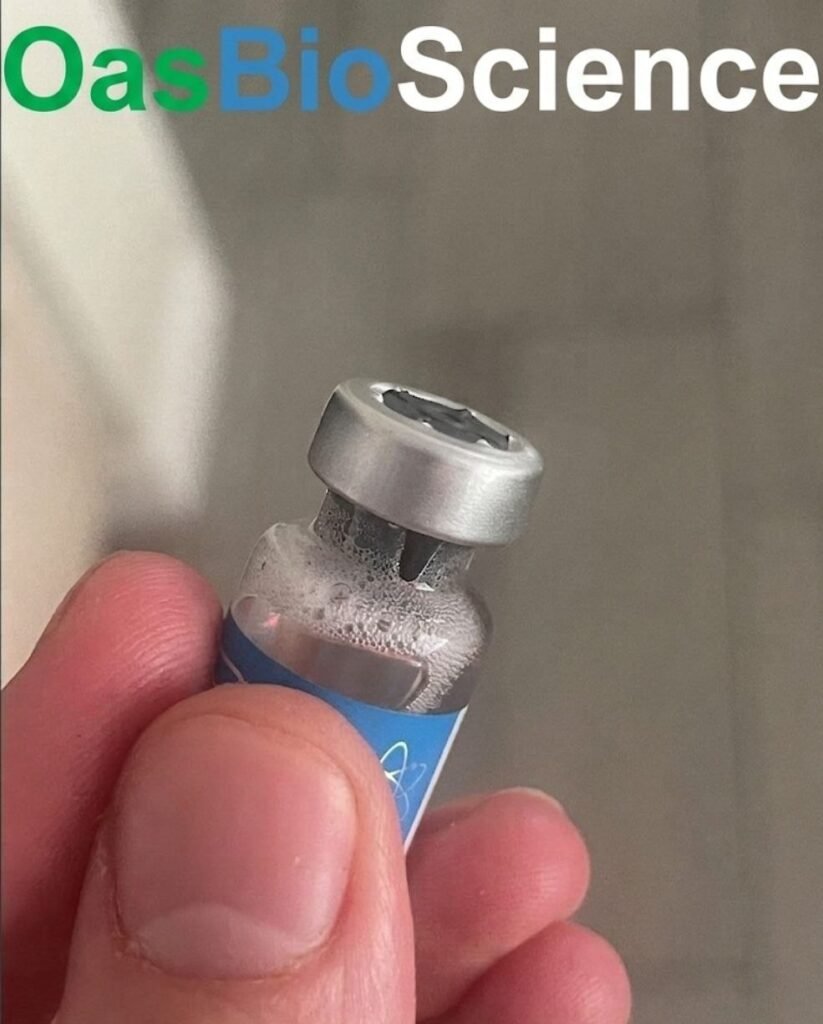
Table of Contents
1. “What Are Bubbles After Reconstitution?” (#what-are-bubbles-after-reconstitution)
2. “Why Do Bubbles Form After Reconstitution?” (#why-do-bubbles-form-after-reconstitution)
3. “The Most Common Causes of Bubbles After Reconstitution” (#the-most-common-causes-of-bubbles-after-reconstitution)
4. “How Vacuum Inside a Lyophilized Vial Creates Bubbles” (#how-vacuum-inside-a-lyophilized-vial-creates-bubbles)
5. “Why Shaking Can Create Persistent Foam” (#why-shaking-can-create-persistent-foam)
6. “Peptide Structure and Formulation Matter” (#peptide-structure-and-formulation-matter)
7. “Temporary Bubbles vs Persistent Foam” (#temporary-bubbles-vs-persistent-foam)
8. “The Best Way to Minimize Bubbles After Reconstitution” (#the-best-way-to-minimize-bubbles-after-reconstitution)
9. “A Practical Troubleshooting Protocol” (#a-practical-troubleshooting-protocol)
10. “BPC-157 Case Study” (#bpc-157-case-study)
11. “How to Tell Bubbles From Possible Peptide Degradation” (#how-to-tell-bubbles-from-possible-peptide-degradation)
12. “What HPLC and Mass Spectrometry Can Tell You” (#what-hplc-and-mass-spectrometry-can-tell-you)
13. “Common Reconstitution Mistakes” (#common-reconstitution-mistakes)
14. “When Should Researchers Be Concerned?” (#when-should-researchers-be-concerned)
15. “Frequently Asked Questions” (#frequently-asked-questions)
16. “Final Takeaway” (#final-takeaway)
What Are Bubbles After Reconstitution?
Bubbles after reconstitution are pockets of gas temporarily trapped within the liquid or concentrated at the liquid surface.
They can range from:
• Large visible air bubbles
• Small microbubbles
• A cloudy or aerated appearance
• A thin layer of surface bubbles
• Dense white foam
• Persistent microfoam
The important point is that a bubble is not automatically a degradation product.
A freshly reconstituted peptide solution can look temporarily cloudy simply because millions of microscopic air bubbles scatter light.
This is similar to what happens when air is incorporated into other aqueous solutions. The solution may appear milky or hazy even though the underlying liquid has not necessarily undergone a chemical reaction.
For peptide researchers, the challenge is distinguishing physical aeration from a genuine change in the sample.
That distinction should be based on observation, handling history, and—when necessary—analytical testing.
Why Do Bubbles Form After Reconstitution?
There is rarely one single cause of bubbles after reconstitution.
Several factors can contribute simultaneously.
The most common include:
1. Rapid diluent entry
2. Vacuum-driven liquid movement
3. Direct impact of liquid against the lyophilized cake
4. Shaking or vortexing
5. Repeated drawing and expelling of liquid
6. Excessive syringe pressure
7. Temperature differences
8. Peptide concentration
9. Peptide sequence and molecular characteristics
10. Formulation excipients
11. pH and ionic strength
12. Air entrainment during mixing
Understanding these factors makes troubleshooting much easier.
The Most Common Causes of Bubbles After Reconstitution
1. Injecting the Diluent Too Quickly
One of the simplest explanations for bubbles after reconstitution is excessive flow velocity.
When liquid enters the vial rapidly, the incoming stream can disturb the lyophilized material and entrain air.
Instead of a controlled liquid layer forming inside the vial, the researcher creates turbulence.
That turbulence can generate numerous small air pockets.
The faster and more aggressively liquid enters, the greater the possibility of aeration.
For sensitive peptide formulations, controlled liquid movement is therefore preferable to forceful spraying or jetting.
2. Directly Hitting the Lyophilized Cake
Another common mistake is directing the incoming diluent directly onto the center of the powder cake.
This can cause:
• Localized mechanical impact
• Splashing
• Powder displacement
• Turbulence
• Air entrainment
• Rapid dissolution at one location
A gentler approach is generally to allow the diluent to travel along the inner vial wall rather than deliberately blasting the lyophilized material.
This is one of the most important practical lessons I have seen repeatedly in peptide handling.
3. Shaking the Vial
Shaking is one of the fastest ways to turn a few bubbles into substantial foam.
When the vial is shaken, the liquid repeatedly moves through the air-liquid interface.
That creates new bubbles continuously.
Some peptides and protein-like molecules can interact with the air-liquid interface, which can make the resulting foam more persistent.
For that reason, gentle rolling or slow swirling is generally preferable when the product documentation allows it.
4. Vortexing
Vortexing introduces even more mechanical energy.
A vortex creates intense circular fluid movement and rapidly incorporates air.
If a researcher is already seeing bubbles after reconstitution, vortexing usually makes the visual problem worse rather than better.
It can also complicate interpretation because the researcher may no longer know whether persistent cloudiness is caused by air, undissolved material, precipitation, or aggregation.
How Vacuum Inside a Lyophilized Vial Creates Bubbles
Many lyophilized products are packaged under controlled pressure conditions.
When a needle is introduced and the pressure difference between the vial and syringe changes, liquid movement can occur more rapidly than expected.
A researcher may experience the syringe plunger being pulled because of the pressure differential.
If that movement is not controlled, the diluent can enter the vial rapidly.
The result can be:
pressure differential → rapid liquid movement → turbulence → air entrainment → bubbles after reconstitution
This is why vacuum control is an important part of a gentle reconstitution technique.
The goal is not to fight the vial aggressively.
The goal is to prevent uncontrolled liquid movement.
Why Shaking Can Create Persistent Foam
There is an important scientific distinction here.
A bubble is primarily a physical gas-liquid structure.
Persistent foam, however, can be stabilized when surface-active molecules accumulate at the air-liquid interface.
Some peptides, proteins, and formulation components can interact with that interface.
This is particularly relevant for larger proteins and some amphipathic molecules.
An amphipathic molecule has regions with different affinities for water and nonpolar environments. At an air-water interface, such molecules can orient in ways that stabilize the interface.
This does not mean that every foamy peptide has been chemically degraded.
It means that the molecular and formulation environment can influence how easily bubbles form and how long they remain.
This distinction is essential.
Peptide Structure and Formulation Matter
Not every peptide behaves identically.
Two different peptides can be exposed to the same diluent and the same mixing procedure and produce completely different visual results.
Several factors can influence the behavior of bubbles after reconstitution.
Molecular Size
Larger proteins and polypeptides can be more sensitive to interfacial stresses than many small peptides.
Human growth hormone and insulin-related products, for example, require carefully controlled handling because aggregation and other physical changes can be important quality attributes.
This is one reason it is inappropriate to make a universal claim that every peptide will respond identically to agitation.
Amphipathicity
Some peptide sequences contain both hydrophilic and hydrophobic regions.
These molecular characteristics can influence interactions at interfaces.
When air is introduced during aggressive mixing, surface-active molecules may accumulate around bubbles and make those bubbles more persistent.
This is one reason certain sequences may foam more readily than others.
Concentration
Higher concentrations can change solution behavior.
More molecules are available to interact at the air-liquid interface.
As a result, the same mixing action can produce different amounts of foam at different concentrations.
pH
The charge state of a peptide depends partly on the surrounding pH.
Near certain charge conditions, solubility and intermolecular interactions can change.
That can influence whether a peptide remains readily soluble and how it behaves during reconstitution.
This is one reason pH should not be treated as an afterthought when troubleshooting unusual reconstitution behavior.
Ionic Strength
Salts can influence electrostatic interactions between molecules.
Changing ionic strength can therefore affect solubility, intermolecular association, and sometimes the physical stability of peptide or protein solutions.
The appropriate diluent should always be determined from the product’s validated instructions rather than assuming that one diluent is universally appropriate for every peptide.
Excipients and Surfactants
Some pharmaceutical peptide and protein formulations contain excipients designed to improve stability.
These can include sugars, polyols, buffers, and surfactants.
Surfactants can lower surface tension, which may influence bubble formation.
Therefore, the presence of bubbles does not necessarily mean there is a contaminant in the product.
It may reflect the interaction between the formulation, liquid, and mixing process.
Temporary Bubbles vs Persistent Foam
This is where researchers should focus most of their attention.
Temporary bubbles
Temporary bubbles after reconstitution generally:
• Appear immediately after liquid entry or gentle mixing
• Move toward the surface
• Coalesce over time
• Gradually disappear
• Leave a clear solution behind
Persistent foam
Persistent foam is different.
It may:
• Form a dense white layer
• Contain extremely small bubbles
• Resist collapse
• Remain visible for an extended period
• Be associated with aggressive shaking or vortexing
The appearance alone, however, cannot prove that chemical degradation occurred.
Persistent foam tells you that the sample experienced substantial interfacial activity and/or mechanical agitation. It should prompt closer examination rather than an automatic conclusion that the peptide is destroyed.
How Long Should Bubbles After Reconstitution Last?
There is no scientifically universal timer that applies to every peptide formulation.
This is important because fixed claims such as “all bubbles must disappear within exactly 15 minutes” can be misleading.
The disappearance rate depends on:
• Bubble size
• Solution viscosity
• Temperature
• Surface tension
• Peptide concentration
• Formulation
• Container geometry
• Agitation history
Large bubbles can disappear quickly.
Microbubbles may persist longer.
A solution can also look cloudy simply because of microscopic aeration and then become clear as those bubbles escape.
The better question is not:
“Has exactly 15 minutes passed?”
Instead ask:
“Is the sample progressively clearing, or is there persistent turbidity, particulate material, precipitation, or another change that cannot be explained by trapped air?”
The Best Way to Minimize Bubbles After Reconstitution
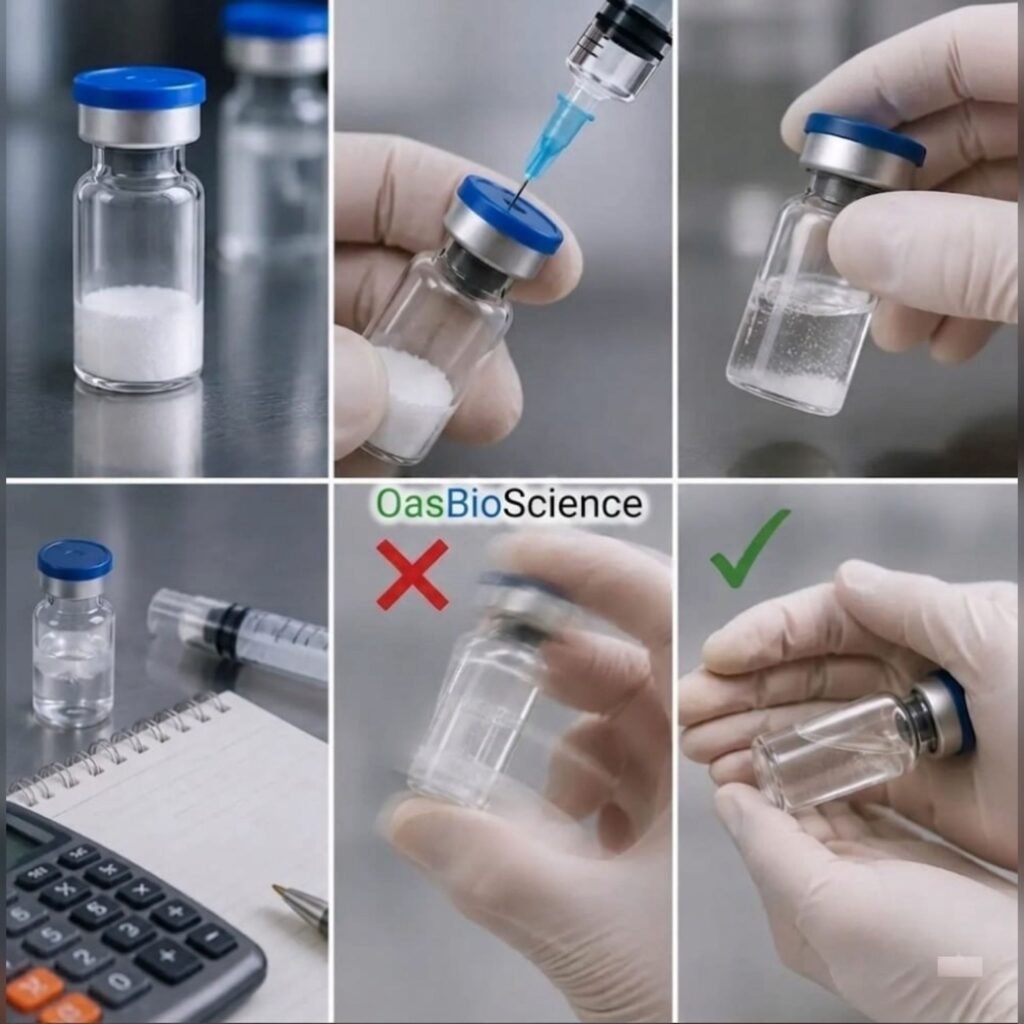
A gentle reconstitution technique is generally the best starting point.
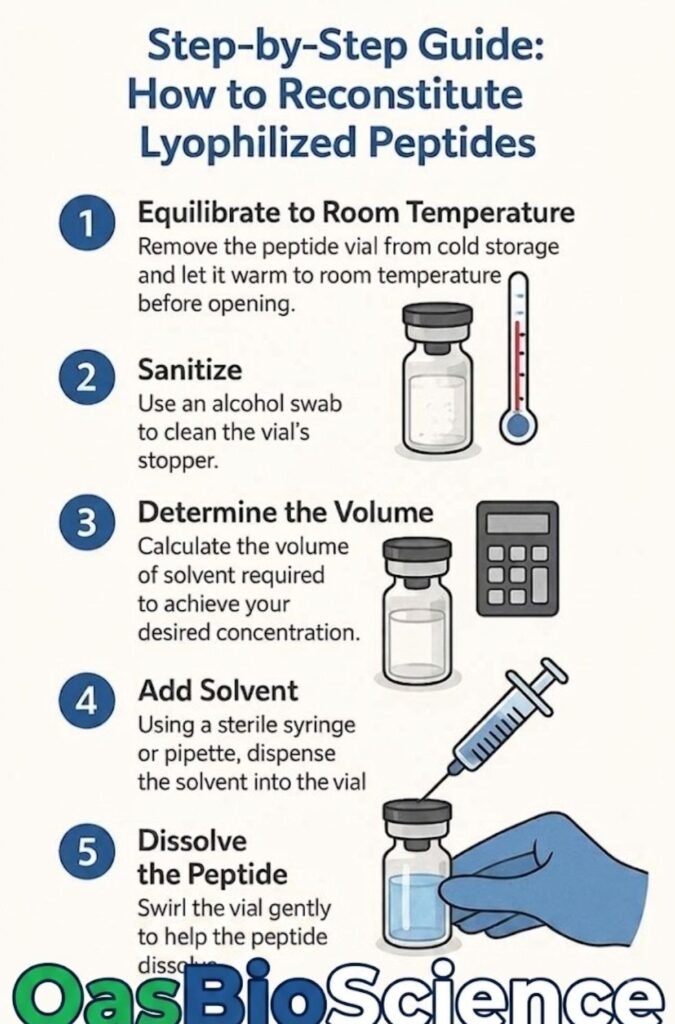
Step 1: Prepare the Required Materials
Use the diluent and equipment specified by the applicable laboratory procedure or product documentation.
Do not improvise a diluent simply because another solvent is commonly used for a different peptide.
Step 2: Draw the Diluent Carefully
Avoid creating excessive turbulence inside the syringe.
Large amounts of air should not be intentionally introduced into the liquid unless a validated procedure specifically calls for it.
Step 3: Control Liquid Entry
When the vial configuration and procedure permit, position the needle so that the incoming liquid contacts the inner vial wall rather than forcefully striking the lyophilized cake.
The objective is smooth, low-turbulence liquid entry.
Step 4: Avoid Rapid Plunger Movement
Do not allow the vial’s pressure differential to suddenly accelerate the liquid.
Controlled movement reduces the likelihood of splashing and air entrainment.
Step 5: Do Not Shake
After the diluent enters the vial, avoid vigorous shaking.
Instead, use gentle movement appropriate to the product’s instructions.
For many peptide preparations, gentle rolling or slow swirling is preferable to aggressive vertical shaking.
Step 6: Let the Solution Rest
After mixing, allow the sample to settle according to the applicable laboratory procedure.
Do not immediately interpret every bubble as a chemical problem.
Observe whether the solution progressively clears.
Step 7: Evaluate the Final Appearance
Once the sample has had an appropriate opportunity to settle, examine it for:
• Clarity
• Color
• Visible particles
• Precipitate
• Undissolved material
• Persistent foam
If something looks abnormal, compare it with the product’s specifications and validated documentation.
A Practical Troubleshooting Protocol for Bubbles After Reconstitution
When a researcher contacts us about bubbles after reconstitution, I recommend thinking through the problem systematically.
Question 1: What did the sample look like immediately?
Was it:
• A few large bubbles?
• Fine microbubbles?
• A thin surface layer?
• Dense foam?
• Uniform cloudiness?
The initial appearance provides useful information.
Question 2: How was the diluent introduced?
Was it introduced slowly and smoothly?
Or was it forced rapidly into the vial?
Question 3: Did the liquid hit the powder directly?
Direct impact can produce significantly more turbulence than controlled wall-directed flow.
Question 4: Was the vial shaken?
This is one of the most important troubleshooting questions.
Question 5: Was the vial vortexed?
If yes, the sample has experienced considerably more mechanical agitation.
Question 6: Is the sample becoming clearer?
Progressive clearing supports the possibility that the original appearance was largely due to aeration.
Question 7: Are there actual particles?
Particles that remain after the bubbles have disappeared deserve separate investigation.
Question 8: Has the color changed?
Unexpected discoloration is more concerning than ordinary transient bubbles.
Question 9: What does the analytical data show?
For research-quality investigations, HPLC and mass spectrometry can provide substantially more information than visual inspection alone.
BPC-157 Case Study: When Bubbles After Reconstitution Looked Like a Failed Sample
One of the most useful ways to understand bubbles after reconstitution is through a practical example.
The Scenario
A researcher was working with a lyophilized BPC-157 preparation.
The researcher introduced the diluent directly toward the center of the lyophilized cake.
The vial’s pressure differential caused rapid liquid movement.
The solution immediately developed substantial micro-aeration.
The researcher then shook the vial vigorously for approximately 15 seconds in an attempt to accelerate dissolution.
What Happened?
The solution became visibly cloudy.
A dense layer of small bubbles and foam formed in the upper portion of the vial.
After sitting undisturbed, the foam persisted much longer than the researcher expected.
The researcher initially believed the peptide had been ruined.
That conclusion was understandable—but premature.
What Was the Likely Cause?
The handling sequence provided a much more plausible explanation:
rapid liquid entry + direct impact + vigorous shaking = significant air entrainment and foam formation
The initial problem was not necessarily the raw peptide.
The handling method itself had created the visual abnormality.
Corrective Approach
The researcher was advised to focus on controlled liquid entry and gentle mixing rather than forceful agitation.
The revised process emphasized:
• Controlled pressure
• Smooth wall-directed liquid flow
• Avoiding direct force against the cake
• Avoiding vigorous shaking
• Gentle rolling or swirling
• Allowing the sample to settle before judging its appearance
The resulting preparation showed substantially less visible aeration.
The Lesson
The most important lesson is not that every foamy BPC-157 sample is automatically acceptable.
The lesson is:
«Do not diagnose peptide degradation from bubbles alone.»
Visual appearance should be interpreted alongside the handling history and, where necessary, analytical evidence.
How to Tell Bubbles From Possible Peptide Degradation
This is one of the most important sections of the entire article.
A researcher seeing bubbles after reconstitution should not automatically assume degradation.
At the same time, researchers should not automatically assume that every cloudy solution is harmless.
Look for the difference between air and material.
Signs More Consistent With Trapped Air
Examples include:
• Visible bubbles that rise toward the surface
• Bubble populations that progressively decrease
• A solution that becomes clearer as it rests
• No visible particles after bubbles disappear
• No unexpected color change
• A clear solution after aeration resolves
These observations are consistent with a physical aeration event.
They are not, by themselves, proof of chemical integrity—but they are less concerning than persistent particulate or color changes.
Signs That Deserve Further Investigation
Pay closer attention when you observe:
Persistent Turbidity
If the solution remains uniformly cloudy after the visible bubbles have disappeared, another phenomenon may be involved.
Potential causes can include:
• Aggregation
• Precipitation
• Poor solubility
• Incompatible formulation conditions
• Contamination
Visual inspection alone cannot identify the exact cause.
Visible Particles
Persistent particles, fibers, flakes, or gel-like material should not simply be classified as bubbles.
If they remain after the solution settles, they deserve investigation.
Unexpected Color Change
A previously clear preparation that develops unusual yellowing, browning, or another unexpected color change warrants attention.
Color changes can have multiple causes, including chemical degradation or formulation effects.
Unexpected Precipitation
Material settling at the bottom of the vial is not the same thing as a bubble.
If a solid or precipitated phase remains after appropriate settling, investigate the formulation and reconstitution conditions.
What HPLC and Mass Spectrometry Can Tell You
Visual inspection has limitations.
For research laboratories investigating peptide quality, analytical techniques can provide substantially stronger evidence.
HPLC
High-performance liquid chromatography can help evaluate chromatographic purity and related species.
Depending on the validated method, HPLC can reveal changes such as:
• Main peak changes
• New peaks
• Changes in impurity profile
• Altered chromatographic distribution
Regulatory guidance recognizes chromatography and other analytical techniques as important tools for investigating peptide and protein quality and degradation.
Mass Spectrometry
Mass spectrometry can provide molecular-mass information that may help investigate whether chemical modifications have occurred.
For example, researchers may investigate possible:
• Oxidation
• Deamidation
• Truncation
• Modification
• Fragmentation
The exact interpretation depends on the peptide and analytical method.
A single MS result should not be treated as a complete stability assessment.
Why One Test Is Not Always Enough
Synthetic peptides occupy an interesting space between traditional small molecules and larger biological products. The EMA’s current synthetic-peptide guideline emphasizes characterization, specifications, impurity control, and analytical control specific to synthetic peptides.
That is why a strong quality investigation can use complementary methods.
For example:
Visual appearance + HPLC + MS + handling history + COA comparison
provides a much stronger basis for interpretation than simply looking at the vial.
Why Your COA Still Matters
A Certificate of Analysis can establish the quality characteristics of the original material at the time and under the conditions covered by the testing.
Depending on the product and laboratory, relevant information may include:
• HPLC purity
• Mass confirmation
• Batch or lot number
• Appearance
• Water content
– Residual solvents
• Other quality attributes
However, a COA does not automatically prove that a researcher handled the material correctly after receiving it.
If a sample later develops unusual characteristics, compare the batch information and available analytical data with the original documentation.
A high-purity starting material can still be mishandled after delivery.
Conversely, a bubble does not prove that a high-quality peptide has become chemically degraded.
Common Reconstitution Mistakes That Create Bubbles
Mistake 1: Shaking Immediately
This is probably one of the easiest ways to create unnecessary foam.
Better approach: use gentle movement consistent with the product procedure.
Mistake 2: Vortexing to Save Time
Fast dissolution is not necessarily better dissolution.
Aggressive mixing can make the sample much harder to interpret.
Mistake 3: Allowing the Vacuum to Pull Liquid Rapidly
Pressure differences can create uncontrolled liquid movement.
Control the process rather than allowing a sudden surge.
Mistake 4: Blasting the Lyophilized Cake
Direct high-velocity impact can cause unnecessary turbulence.
Mistake 5: Repeatedly Drawing Liquid Into and Out of the Vial
Repeated aspiration and expulsion can introduce additional air.
It can also create repeated shear and interface exposure.
Mistake 6: Freezing a Foamy Sample Immediately
Do not assume that freezing is the solution to every reconstitution problem.
Storage conditions should follow the validated product or laboratory requirements.
Stability is product-specific, and temperature, agitation, light, and other environmental factors can influence product quality.
A Better Mental Model: Diagnose the Process, Not Just the Vial
When researchers see bubbles after reconstitution, the natural reaction is to inspect the vial.
But experienced troubleshooting begins by inspecting the process.
Ask:
What happened immediately before the bubbles appeared?
If bubbles appeared immediately after rapid liquid entry, that provides one clue.
If they appeared after vigorous shaking, that provides another.
If the sample becomes clear after resting, that provides additional information.
If the solution remains cloudy and develops particles, the situation is different.
This process-oriented approach prevents unnecessary rejection of samples based solely on appearance.
Are Bubbles Always Harmless?
No.
This is an important qualification.
The statement “bubbles are harmless” is too broad.
The more scientifically defensible statement is:
«Bubbles alone do not establish peptide degradation.»
If a sample contains temporary air bubbles and subsequently becomes clear with no other abnormal observations, the bubbles may simply represent entrained air.
But if the sample remains turbid, develops particles, precipitates, changes color, or shows analytical changes, further investigation is appropriate.
Regulatory guidance for biological and lyophilized products specifically recognizes visual appearance, opacity, dissolution behavior, and visible particulates as relevant product characteristics.
Why Reconstitution Technique Matters for Research Quality
Reconstitution is sometimes treated as a simple step:
add liquid → shake → dissolve
That approach is often too simplistic.
USP has specifically noted that improper handling and variations in peptide reference-standard reconstitution can produce inconsistent results, reinforcing the importance of controlled reconstitution procedures in laboratory work.
The objective should be reproducibility.
If five researchers reconstitute the same material using five dramatically different techniques, they may not produce five visually identical samples.
Controlled technique reduces unnecessary variability.
A Practical “Bubbles After Reconstitution” Checklist
Before deciding that a peptide has degraded, ask:
• Was the diluent introduced slowly?
• Was excessive pressure used?
• Did the liquid strike the lyophilized cake directly?
• Was the vial shaken?
• Was it vortexed?
• Did the sample become progressively clearer?
• Are there actual particles remaining?
• Is there persistent turbidity?
• Has the color changed?
• Does the product documentation specify a particular reconstitution method?
• Is the batch/COA information available?
• Would HPLC or MS testing resolve the uncertainty?
This checklist is far more useful than simply asking whether bubbles are present.
Bubbles After Reconstitution: What Researchers in Different Countries Should Consider
The underlying science of bubbles after reconstitution does not change because a researcher is in the United States, Canada, the United Kingdom, Germany, France, Switzerland, Australia, or elsewhere.
What can change is the regulatory environment.
Researchers should therefore separate two questions:
Scientific question
What caused the bubbles?
Regulatory and laboratory question
Is the material legally permitted and appropriately handled for the intended research activity in my jurisdiction?
Those are different questions.
For example, a research laboratory in the United States may operate under different institutional and regulatory requirements than a laboratory in Germany, Switzerland, Canada, or the United Kingdom.
Always follow applicable local requirements and institutional procedures.
Frequently Asked Questions
1. Why are bubbles forming after reconstitution?
The most common causes of bubbles after reconstitution include rapid liquid entry, pressure differences, direct impact on the lyophilized material, vigorous mixing, shaking, vortexing, and air entrainment.
The peptide’s molecular characteristics and formulation can also influence how easily bubbles form and how persistent they become.
2. Do bubbles after reconstitution mean the peptide is bad?
Not necessarily.
Bubbles after reconstitution do not, by themselves, prove that a peptide has degraded.
Temporary bubbles can simply represent entrained air.
Researchers should become more concerned when the sample develops persistent turbidity, visible particles, precipitation, unexpected discoloration, or analytical changes.
3. Why does my peptide become foamy when I shake it?
Shaking introduces substantial mechanical energy and repeatedly creates new air-liquid interfaces.
Some peptides, proteins, and formulation components can stabilize those interfaces, producing persistent foam.
This is why vigorous shaking can produce significantly more foam than controlled, gentle mixing.
4. How can I reduce bubbles after reconstitution?
Use a controlled and gentle reconstitution process.
Avoid rapid liquid entry, direct high-velocity impact against the lyophilized cake, vigorous shaking, and unnecessary vortexing.
Where permitted by the product or laboratory procedure, allowing the sample to settle undisturbed can also help distinguish transient aeration from persistent physical changes.
5. How long do bubbles after reconstitution take to disappear?
There is no universal time that applies to every peptide.
Large bubbles can disappear quickly, while microbubbles may take longer.
Instead of relying on a rigid time limit, monitor whether the sample is progressively clearing.
Persistent turbidity or particles after the visible bubbles have disappeared warrant further investigation.
6. Can shaking damage a peptide?
It depends on the molecule and formulation.
For larger proteins and some sensitive biological molecules, agitation and air-liquid interfaces can contribute to physical instability and aggregation.
For smaller synthetic peptides, the effect is molecule-specific and should not be generalized.
This is why researchers should avoid assuming that every peptide behaves identically.
7. Should I vortex a peptide to make it dissolve faster?
Not unless the applicable validated procedure specifically calls for it.
Vortexing can dramatically increase air incorporation and make bubbles after reconstitution much more pronounced.
Gentler mixing is generally preferable when the product documentation permits it.
8. Why is my peptide cloudy even after the bubbles disappear?
If the sample remains cloudy after visible bubbles have cleared, do not automatically classify the cloudiness as trapped air.
Possible explanations include aggregation, precipitation, poor solubility, formulation incompatibility, or contamination.
Additional investigation may be necessary.
9. Can HPLC tell whether bubbles damaged my peptide?
HPLC can help investigate changes in chromatographic purity and related species, but it cannot answer every possible stability question by itself.
Depending on the suspected failure mechanism, researchers may also need mass spectrometry or other orthogonal analytical methods.
The EMA specifically emphasizes appropriate characterization and analytical control for synthetic peptides.
10. What is the biggest mistake researchers make when they see bubbles after reconstitution?
The biggest mistake is making an immediate chemical diagnosis from a physical observation.
Seeing bubbles does not automatically mean:
“The peptide is degraded.”
Instead, reconstruct the handling history.
Determine how the liquid entered, whether the vial was shaken, whether the sample is clearing, and whether there are any genuine changes such as particles, precipitation, color change, or persistent turbidity.
Final Takeaway: Don’t Confuse Bubbles With Degradation
Bubbles after reconstitution are usually a handling and fluid-mechanics question before they are a chemistry question.
Rapid liquid entry, pressure differences, direct impact on the lyophilized cake, shaking, vortexing, and repeated manipulation can all increase air entrainment.
Peptide structure and formulation can then determine whether those bubbles disappear quickly or develop into persistent foam.
The most important lesson from years of working with researchers since 2003 is simple:
Don’t diagnose a peptide from one visual observation. Diagnose the entire process.
If bubbles appear immediately after reconstitution but progressively disappear and the resulting solution becomes appropriately clear, there may be no reason to assume that the peptide has degraded solely because bubbles were present.
On the other hand, persistent turbidity, visible particles, precipitation, unexpected discoloration, or changes detected by analytical testing deserve closer attention.
For researchers evaluating peptide quality, the strongest approach combines:
controlled reconstitution + careful visual inspection + proper documentation + COA review + appropriate analytical testing.
If you are researching peptide quality, purity, COA interpretation, HPLC testing, or proper peptide handling, you can explore the educational resources available through OasBioScience at “OasBioScience” (https://oasbioscience.com/6).
The goal should never be to make a vial look perfect.
The goal is to understand what happened, why it happened, and whether there is objective evidence that product quality has actually changed.
That is the difference between simply observing bubbles after reconstitution and professionally troubleshooting a peptide preparation.
Read More Related Topics Below To Boost Your Knoeledge On Peptide
- Are peptides safe?
- How Are Peptides Made?
- Peptide Purity explained in depth
- What Does HPLC Testing Mean?
- How do I read a COA?
- How Should Peptides Be Stored?
- How Long Do Peptides Last?
- What Bacteriostatic Water Should I Use For My Peptide?
Sources for Further Reading
– European Medicines Agency (EMA) — Development and Manufacture of Synthetic Peptides: The current EMA guideline addresses manufacturing, characterization, specifications, impurity control, and analytical control of synthetic peptides.
– USP — Best Practices for Reconstitution of USP Peptide Reference Standards: USP highlights how improper handling and variations in reconstitution can contribute to inconsistent laboratory results.
– EMA/ICH — Stability Testing: Stability programs consider environmental and physical factors such as temperature and agitation when evaluating product quality.
– FDA — Stability and Quality Considerations for Biological Products: FDA guidance discusses monitoring characteristics including appearance, opacity, dissolution, visible particulates, aggregation, and fragmentation.
